Showing posts with label project. Show all posts

Monday, August 29, 2011

[GSoC-2011] Final Results and How to Try

I am very glad to announce that I now officially passed the Google-Summer-of-Code 2011 :) The email from Google arrived in the last few days, and the official Google announcements on the GSoC results (of all projects) are supposed to be published tomorrow.

S/He is eyeing you :)
Sources: background, paste
Now, it’s time to publish the instructions on how to get and try it for the people who want to test it. There are some known bugs, and probably some unknown bugs, so be warned.

Compilation and Set-Up Instructions
  1. You should know how to build of GIMP and GEGL from Git. A partially outdated guide is available here, and some things are explained in more depth here.
  2. Instead of building the GEGL master (main) branch, switch to the soc-2011-seamless-clone branch. You can do this by running git checkout soc-2011-seamless-clone. Compile it with the regular flags – nothing special is needed.
  3. After building the updated version of GEGL, it’s time to build the updated version of GIMP. Switch to the soc-2011-seamless-clone2 branch, and build it.
  4. Before running GIMP, you must set the environment variable p2t_refine_steps to some number defining the maximal amount of points to be used in the mesh (in plain English, more should theoretically produce better result). I know this is annoying, I will get rid of it as soon as I finish debugging a certain code part. The typical number I use is 500 for pastes of around 200x200 pixels, and you should probably increase it if you wish to work on large pastes. If you are using the bash terminal, do export p2t_refine_steps=500 (and change the number as you wish)
  5. Run GIMP.
Usage Instructions

Basically, you can just try copying a part, selecting the Seamless Clone tool (Shift+L) and clicking anywhere on the image to start the tool’s interaction. Click Enter to apply the final result. If this doesn’t work (and/or crash), then the instructions below are for you.
  1. Run Gimp :)
  2. Open the image that you wish to use as the background, and open the image you wish to paste into the background. Copy the part you want to paste. Note that opacity of that part will be treated as if it was binary – parts under 50% opacity will be removed, parts of more than 50% opacity will be completely opaque. The shape can be any shape, as long as it follows the following rules:
    1. It must not have holes (Temporary limitation)
    2. It must be continuous, i.e. composed of only one part (Temporary(?) limitation)
    3. It must not have any long thin areas (Temporary(!) limitation).
      This means that if you have any area which is 1 pixel wide and is 3 pixels long or more (i.e. a thin spike), it will crash. Solution for this was already devised, I just need to code it. Select the Seamless-Clone Tool (Either by clicking the second tool on the toolbox that has the same icon as the move tool, or by doing Shift+L).
  3. Click anywhere on the canvas while the background layer is active. The paste will be centered on the cursor, and so the cursor should be in a place where the entire paste is inside the background boundaries (both inside the rectangle defining the layer, and inside an area where all the background below it is opaque). This limitation will be enforced by the User Interface later.
  4. Move the paste by clicking on it, dragging and releasing. If you move it slow enough (which actually shouldn’t be so slow), you’ll see the preview updating while you are moving.
  5. Click Enter to Apply the effect.
Known Bugs
  • All the above mentioned crashes and bugs :)
  • Due to not yet complete memory management, the tool leaks memory from it’s preprocessing.
  • Converting to tile-based processing is NOT 100% done, so it may crash on large pastes. Don’t ask me how large since I didn’t try anything more than 300x300 on my machine.
Other TODO’s
  • Integrate the tool with the help system
  • Test better the interaction when the the active image/display/drawable are switched during the interaction of the tool.
  • Get a decent tool icon. Anyone with ideas for the visual metaphor to be used by a seamless paste tool, is more than welcome to leave them here as comments! I do design icons, but I don’t have an idea for this one.

Monday, August 15, 2011

GSoC 2011 - (Almost) Final results and thanks!

The end of Google Summer of Code 2011 is near, and I have failed to post enough updates on my blog. But that does not mean one bit that I failed to make progress. I'm proud to present you with my results:

Result, using my GIMP tool :D
The image to paste (source)
The image to paste into (source)
Licensed under Creative Commons Attribution-Share Alike 3.0 Unported

My tool allows you to move the paste on the image and see it update according to it's environment, so that it will paste seamlessly. It's not real-time yet, since I recompute some values that should be cached everytime, but most work to enable caching is done, and I hope to reach that before the final deadline. (Even if it won't be before the deadline, I will do it even after GSoC ends).

This is also the time to thanks all the people who made this possible:
  • The authors of the Coordinates for Seamless Cloning article, who developed this algorithm.
  • Prof. Daniel Cohen-Or, the professor who taught me computer graphics at the university, and helped me understanding the article (he is also one of the article authors).
  • My GSoC mentor, Michael Natterer (aka mitch), who agreed to mentor me and assisted me when I was stuck.
  • Mason Green, the original author of the poly2tri library, which was heavily used in the project for computing interpolation meshes. I would have never reached the project deadline without his amazing library.
  • Prof. Jonathan Richard Shewchuk, who developed some of the geometrical algorithms that were used in this project.
  • Finally, special thanks to all the great guys on the GIMP and GEGL irc who helped a lot - mitch, Bat`O, pippin, Alexia_Death, Mikachu, and more.

Friday, January 7, 2011

StructureGraphic is now released!

After a short betta period, in which I sent the library only to few people for testing, I'm  now releasing the first public release of StructureGraphic! Students in the computer lab at my university are actually using this to debug their assignments in the data structures course - This makes me feel some pride :D

To those who haven't read the previous post about StructureGraphic, it's a library for visualizing data structures in java. Mainly, but not only, for debugging purposes.

Visualizations of a Binomial Heap (top) and a Red Black Tree (bottom)
Click to view fullsize
Feel free to dig into the source code and use the functions which are not yet documented. I'll complete the documentation of all the core functions later. Also, I'll try to make sure that any change in the library will be backwards compatiable - at least for the functions described in the official manual.

The library is currently licensed under GPLv3. If there are any projects which wish to use it, and have problems with that license, they can contact me.

Wednesday, December 29, 2010

Finished my Raytracer!

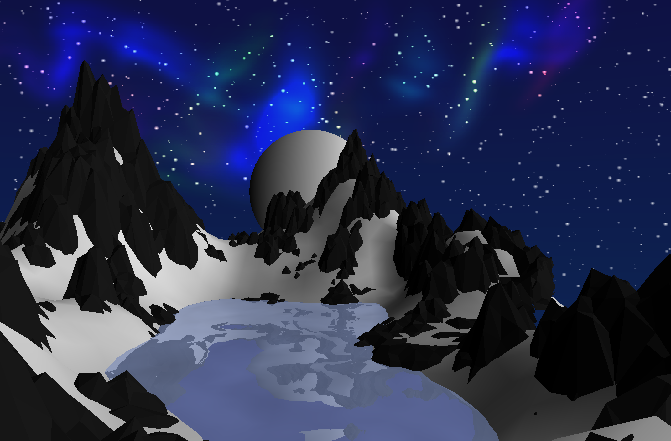
Snowy Night
15K faces, includes reflection and phong normal interpolation
Above you can see the splash screen for my raytracer! Just handed it in, and overall I'm proud of myself (many thanks to my partner, the guru behind most of the lighting!). The code is very optmized (as much optimized as I can get without starting to write unreadable code).

Overall, I would summarize this assignment as something which I learned from - not only about graphics, but mainly about, how to optimize code (changing several lines for example made everything 3 times faster), how to debug properly and about writing larger scale programs (4000 lines is not gigantic, but it's bigger than anything I dealt with in the past, in which I knew what every line does).

The interesting part was writing the Octal Tree, aka Octree (Blender users should know what this is!). This was my first attempt at developing a high-performance data structure on my own, without any reference (there are many on google, but I used none). On the way I developed several optimization tricks (to make the tree less deep, to reduce the penalty of empty areas, and to overcome some other non-optimal meshes).

I really enjoyed most of this assignment (except for the part in which some of the reference renders had mistakes in them - wasting 6 hours because they have a mistake is NOT fun...) and developing most of the fast calculations for the geometry (not for the lighting) was fun.

The document describing the math which I used will be released later this week (as a starting point for people who want to write ray tracers), along with a list of annoying and potentially common bugs when writing a raytracer. Also an update about StructureGraphic - still waiting for the answer from the proffessor about hosting it the university. If he won't answer soon, I'll host it externally (any suggestions for code hosting sites or tips for choosing between github, launchpad, etc. ?). BTW, The next project in the course is writing a simple 3D game engine in OpenGL, and then writing a game with it :D

Tuesday, December 21, 2010

Announcing - Project LibStructureGraphic

Note: This post is targeted mainly at programmers or people interested in visualization of data

As programmers, we often write very complex data structures. The hard part about maintaining complex data structures, is tracing bugs - since let's face it, in many places it's not practical to find which node out of several hundreds is deffected.

That's why I started a new project, called LibStructureGraphic. It's a library in Java, for visualizing data structures while making minimal or even no changes to their code. And since a picture is worth Ackermann(4,3) words (This is a programmers joke), here is an example:

Visualizations of a Binomial Heap (top) and a Red Black Tree (bottom)
Click to view fullsize

The idea is that having a visualization of the graph should help the programmer see more data at once, and speed up the times spent on finding bugs. I personally used custom code for drawing some data structures (for debugging) during my data structure course, and this was the source of this project. The visualization saved me hours of debugging!

The library requires a data structure to have the following properties in order to be visualized:
  1. For now (will change in the future), the data structure must be representable as a Tree, which means it's composed of nodes where each node has exactly 1 parent and zero or more children.
    Support for Directed-Acyclic-Graphs (DAGs) will be added in one of the next versions, and support for cyclic graphs is planned for the future
  2. Each node of the data structure should be represented by an object, which either implements a given interface (for finding the "children", "value" and "color" of the node), or has annotations on the fields that should be drawn. Ideally, the annotations are the preferred way since they mean you don't need to implement any custom functions; The interface is there only for nodes in which it's not possible.
    The nodes don't have to be of the same type - each node can be a completly different type of object!
The library will be released soon - I'm waiting only to see if one of the professors of my university will be willing to host it on its servers as an official project or not (Since this could be very useful in at least 3 mandatory courses). Non-Java versions (python, C#, C++, and potentially C with GObject) are not currently planned, but if enough people will want it, I will consider it ;)

And, the GIMP connection to this project (you didn't really expect me to write a post without mentioning GIMP, didn't you?) is that I'm working on a node-editor for GEGL. I knew I needed to implement a graph layout algorithm for it, and since I'm prototyping everything in Java, I thought of making a library from it.